Monday, February 20, 2012

Basketball Blankie


So I always see football and baseball inspired crafts on pinterest and craft blogs but very few basketball things, and being a basketball girl myself I decided to come up with a pattern to make a basketball blanket.
Its very simple...it took me about two hours to complete but that time estimate includes refilling sippy cups, changing diapers, and wiping noses...:) So I'm sure it can be done in about an hour.

You will need: 1 yd of  Orange Fabric.  You can use anything.  I actually prefer the dotted minky because I think the dots make the blanket look like the texture of an actual ball but Joann's had this soft and plush on sale so I went with it.
                         1 yd of cordinating fabric.  I found a cute flannel basketball fabric, but you can use anything for this side also.
                         1/8 yd of black fleece.
                         Rotary cutter, scissors, cooridinating thread, 6 sheets of paper, sharpie, a piece of yarn and tape.


First to make a circle pattern tape pieces of paper together in two rows of three. 


Next you want to cut your string or yarn.  You want to cut the yarn half of the size you want the blanket to be.  I wanted mine to be around 38" so I used a string that was 19" long.  I then tied it to a sharpie.

Now take the end of the string that isn't tied to sharpie and place it at the bottom left corner of the papers you taped together and stretch the sharpie end straight above the bottom piece.

Then holding the bottom part in place take the sharpie and go downward making an arch.


And it should look like this.


No just cut it out and you have your pattern. :)


Now you can cut our your fabric.  Take your fabric and lay it out then fold it in half long ways.


Then fold in half the other way so that you have two folded sides.


Line up the folds with your pattern.

Now take your rotary cutter and cut fabric.  Then repeat with the other fabric.


Next you will need to cut black strips of fleece to make the lines on the basketball.  Again depending on how big you make your blanket will determine how long you will need to cut the fleece.  You want them to be about 1.5" wide and a few inches longer than the blanket.  I laid mine out and played with the placement first.


Once you get it just right pin in place and sew the strips on. 


And don't be jealous of my dinosaur of a sewing machine...ha! She was my grandmother's machine and has been great to learn on. :) After watching the Superbowl halftime show this year I named her Madonna because she is 50 plus years and still rocks! :)

Here she is in all her glory :)

Now back to the blanket.  Once you have sewn on all the strips, lay it out pretty side facing up.  Then lay second fabric on top pretty side facing down.  So right sides should be facing each other.


 Pin in place and sew together using a 1/4" seam.  When you are sewing the two pieces together stop several inches from completely sewing all the way around so you will have a place to turn the blanket right side out.  After you turn it right side out sew that hole together.


And ta-da...


Tuesday, February 7, 2012

Barefoot Baby Sandals


Little gems like these are why I NEED a little girl! ha Yeah right I need another baby right now like I need a hole in my head! I first saw them at a craft fair and fell in love but they were fabric and sewing isn't my strong suit so I had forgotten about them. Then one day browsing pinterest I saw a crocheted pair but never could find a pattern for them. I had never made a pattern from scratch so I was a little weary of it but I'm really excited about what I came up with. 
It's a very simple pattern so beginners dive right in!

First you will need:

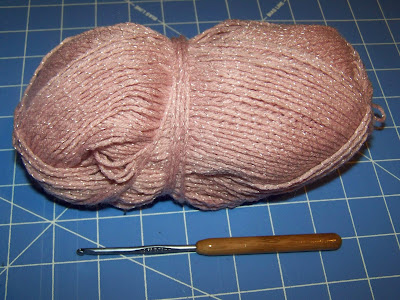
     Sport weight or light worsted weight yarn.
     E or F size hook.  I tend to make really tight stiches so I used an F hook but if you crochet more loosely I'd reccomend an E hook.

Chain 8. Slip stich to first chain to form a ring.  This will be the loop that goes around the toe.

Row 1:  Chain 2(counts as first DC now and throughout) DC twice into ring. (3 DC's)  This forms the base of the triangle.

Round 2:  Chain 2.  Turn. DC in each stitch across. (4 DC)


Round 3:  Chain 2 and turn. DC in next DC.  DC twice in next.  DC in each of last two stitches. (6 DC's)


Round 4:  Chain 2 and turn. DC in first DC. Chain 2, skip next DC and SC in next DC. 


 Chain 2, skip next DC. DC in last two DC's of row.


Edging:  Chain 1. Single crochet down side of triangle towards ring.


   10 SC into the ring.


And continue to SC up the other side of triangle.


Once you reach end of this side chain 30 and finish off.


Join into first SC of edging.


Now chain 30 on this side.  These two chain 30 strands are what you will tie behind ankle.


Another way to finish it is after you finish the edging instead of chaining 30, chain 10-15 and join it to opposite side.  One of my testers for this project said her daughter would pull at the ties so this might be a more suitable solution. 


Now the fun stuff begins. You can add crocheted flowers, pom poms, bling, ribbon....etc to the top. I like the crocheted flowers with a little sparkle ;). 


If you're not a crochet-er(pretty sure thats not a word but you know what I mean) I have added these to my etsy shop. :)
*Also you are more than welcome to sell what you make from this pattern in small quantities but please use your own photographs. 


Friday, February 3, 2012

The Beginning

This is my first blog so bear with! :) 

I'll start by introducing myself!  My name is Ashley and I am a mother to a very adorable, sweet, handsome, gross, usually filthy, weird, and loveable 19 month old boy named Zane.  He is my heart!
Told you he was handsome! :)

I currently am a stay at home mom to that little angel.  I also have recently started a small shop on etsy for my crochet products.  Check it out! http://www.etsy.com/shop/ashleysharp
I love love love to crochet, cook, sew, and anything crafty.  I do believe crafts are god's way of keeping mom's sane! :) Crafting takes me away from all the sippy cup spills, diaper mishaps, runny noses, and the stresses of being a mommy.  It allows me to focus on something (which ironically is usually something for that same sippy cup spilling and diaper mishappin stressful boy) and channel some energy into something that most times I can be proud of.  There are those times that the project goes completely awry hence the misadventure portion of the name of this blog, but can still be proud that a lesson was learned...maybe ;)
I am semi-self-taught on most of my skills.  I say semi because my mother is the Ultimate crafter and she taught me most of the basics. So this blog is dedicated to my self-education.  I want to share my secrets, mishaps, and creations.

My current project is creating a crochet pattern for super cute barefoot baby sandals!  Will post next blog when I work out all the kinks. here is a little teaser of what I've come up with so far.